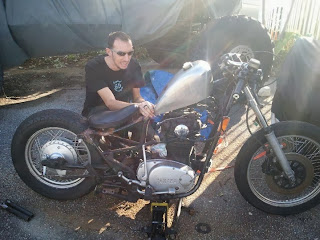
Somehow these little Yamaha twins keep popping into my life. We had the crazy mutant hardtail, drag bike, StreetCHOPPER thing. That ultimately turned into an unrideable waste of time. There was the cafe, streetfighter, StreetRACER project that never got finished because someone bought it along with the yard find rust bucket. This time my good buddy found one in fairly good shape that ran well for all of 3 hours before he realized the entire electrical system was crap. About 3 months ago we replaced everything with a PMA swap and Pamco unit and it's run well ever since. Then he sold the CB400T hardtail project and dumped some money into this one. After totaling the Savage Brat in an accident last year he has been jones'n for another Brat Style ride. Enter XS650 project number 4. This one is on the road and running well though. Follow along as we take a perfectly good motorcycle and cut it it bits...

The starting point is an '83 Heritage Special with clubman bars. At this point the PMA/Pamco swap has been done. Next step was get everything striped off that wasn't to be used.
The idea was to have the seat rail match the angle of the backbone. The seat rails were severed just in front of the shock mounts and pie cuts made in several areas starting just behind the back bone and 3/4 of the way back to produce the slope and curve of the seat rails we desired. We also lowered the shock mounts 2 inches and cut the rest of the frame off from the shock mount back.
After a bit of cutting, grinding, hammering, welding, measuring and the occasional swearing, we get to this point. The original plan was to add struts. A set was made from 1.5" DOM tube and machined solid rod for the mounting points. the frame has been capped and we are ready to start mounting the new seat and tank and rewire the bike.
Frisco Sporty Tank, cheap solo seat.
Battery box for 5aH battery. Mounted under seat.
Rewiring the 8 wires to run this thing. Wire diagram on smartphone, Awesome!
Blue on the tank, Black everywhere else. Fresh paint and a handful of wires to button 4 days of work.
Happy owner after the first shake down run.


No comments:
Post a Comment